


How to Use the Hip Hook: At-Home Iliacus and Psoas Release
Your iliacus and psoas are the deepest hip flexors in your body. When they hold chronic tension, they can contribute to hip pain, low back pain, and restricted movement. Both attach inside the pelvis, where foam rollers and massage guns can't reach. Stretching doesn't release that tension, either.
Releasing these muscles takes precise pressure held for 90 seconds or more in one exact spot. A trained manual therapist can do that by hand, but holding it through a thumb or elbow session after session is hard to sustain.
The Hip Hook's tip reaches the psoas, and it angles in toward the inside of the pelvic bone to reach the iliacus. The tool holds steady pressure without your hands doing the work. That's what makes this something you can do at home, not only in a treatment room.
Where do I use the Hip Hook?
You use the Hip Hook just inside the front of your hip bone, above the hip crease. This hand-sized area between your hip bone and belly button is the release zone. You can reach both the iliacus and psoas from here.
To find the release zone, first feel for the bony point at the front of your hip (the anterior superior iliac spine, or ASIS). Place your hand flat on your lower abdomen with your fingers pointing down, and the outside edge of your hand just inside the pelvic bone.
Your fingertips should stay above the crease in your hip. To check, keep your hand flat and lift your knee like you're marching in place. If your fingertips get pushed or bent back, slide your hand up a little until they stay flat as you march.

The area under your hand is the release zone, and you can use the Hip Hook anywhere in it. Moving the tip higher or lower, closer to the bone or farther from it, targets different spots in the hip flexors.
Where the tip lands, and which way it angles, decides whether you're working the iliacus or the psoas.
Can I use the Hip Hook in the hip crease?
No. Keep the Hip Hook above the hip crease at all times. Nerves and blood vessels, including the femoral nerve, pass through the crease, and they aren't safe to compress with a precise, focused tool like the Hip Hook. If you want release in that area, use the Orbit instead. Its broader surface spreads the pressure out and feels softer.
Should I start with the Orbit or the Hip Hook?
Start with the Orbit if you're new to hip flexor release or if the area is very sensitive. It's a broader, softer tool, so you can get familiar with the release zone and the feel of sustained pressure before going deeper with the Hip Hook.
The Orbit reaches the psoas well, but note that it can't reach the iliacus. The iliacus sits tucked against the inside of the pelvic bone, and the Orbit's broader shape can't get around the bone the way the Hip Hook's curved tip can. To release the iliacus, you'll need the Hip Hook.

How do I target the iliacus with the Hip Hook?
To target the iliacus, place the tip of the Hip Hook close to the pelvic bone, then rotate it around the bone's inner edge. The iliacus lines the inside wall of the pelvis, so the tip has to hook around the bone to press on it directly.
- Place the tip in the release zone, closer to the pelvic bone. This is the outside edge of the zone, where the ring and pinky finger side of your hand rested.
- Place the metal platform of the Hip Hook flat against a wall (if standing) or the floor (if lying down). Let your body weight settle into it to begin adding pressure.
- Give the tip a moment to sink into the soft tissue. It needs to settle into the pelvic region before it can reach deep enough for the iliacus.
- Press the handle toward the wall or floor to rotate the tip around the pelvic bone. You'll feel the platform lift slightly off the surface as the tip rotates in.
- Hold steady for 90 seconds and let the tissue respond. The iliacus is often the missing piece when hip flexor release doesn't seem to work. It responds to sustained, direct pressure, which is what the Hip Hook's curved tip is shaped to deliver.
READ MORE: What is the Iliacus Muscle?
How do I target the psoas with the Hip Hook?
To target the psoas, place the tip of the Hip Hook farther from the pelvic bone and keep it pointing straight in. The psoas runs along the lumbar spine and down through the pelvis, so it sits more centrally than the iliacus. You don't need to rotate the tip to reach it.
- Place the tip in the release zone, farther from the pelvic bone. This is the inside edge of the zone, where the index and middle finger side of your hand rested.
- Place the metal platform of the Hip Hook flat against a wall (if standing) or the floor (if lying down). Let your body weight settle into it to begin adding pressure.
- Give the tip a moment to sink into the soft tissue. The psoas sits deep, so the tip needs time to settle before it reaches the muscle.
- Keep the tip pointing straight in and the platform flat the whole time. Don't press the handle.
- Hold steady for 90 seconds and let the tissue respond. Because the psoas sits deep and toward the center of the body, the sensation often feels more spread out, or shows up somewhere else, like the low back. That's normal.
READ MORE: What is the Psoas Muscle?
Should I use the Hip Hook standing or lying down?
You can use the Hip Hook standing against a wall or lying on the floor. Start standing. It's easier to control the pressure, and you can step away anytime. Lying on the floor puts more of your body weight into the tool, so it's the more intense option once you're comfortable.
Both positions work the same way. The Hip Hook has a curved tip and a handle with a metal platform. The tip goes in the release zone, and the platform rests against the wall or floor to give you leverage. From there, position the tip for the iliacus or psoas as described above.
New to hip flexor release? You may want to start with the Orbit first.
How do I use the Hip Hook standing?
To use the Hip Hook standing, face a wall and lean your body weight into the tool, with the metal platform flat against the wall.
- Stand facing a wall, and position the tip of the Hip Hook in the release zone.
- Place the metal platform of the Hip Hook flat against the wall.
- Lean your body weight into the tool gently to begin adding pressure.
To adjust the pressure: Standing with your feet even gives you moderate pressure. Step one foot back to go deeper. Start with your feet even and progress once you're comfortable.
To target the psoas or iliacus: For the iliacus, place the tip closer to the pelvic bone and gently press the handle to rotate it in. For the psoas, place the tip farther from the bone, keep it pointing straight into your body, and don't press the handle.

How do I use the Hip Hook lying down?
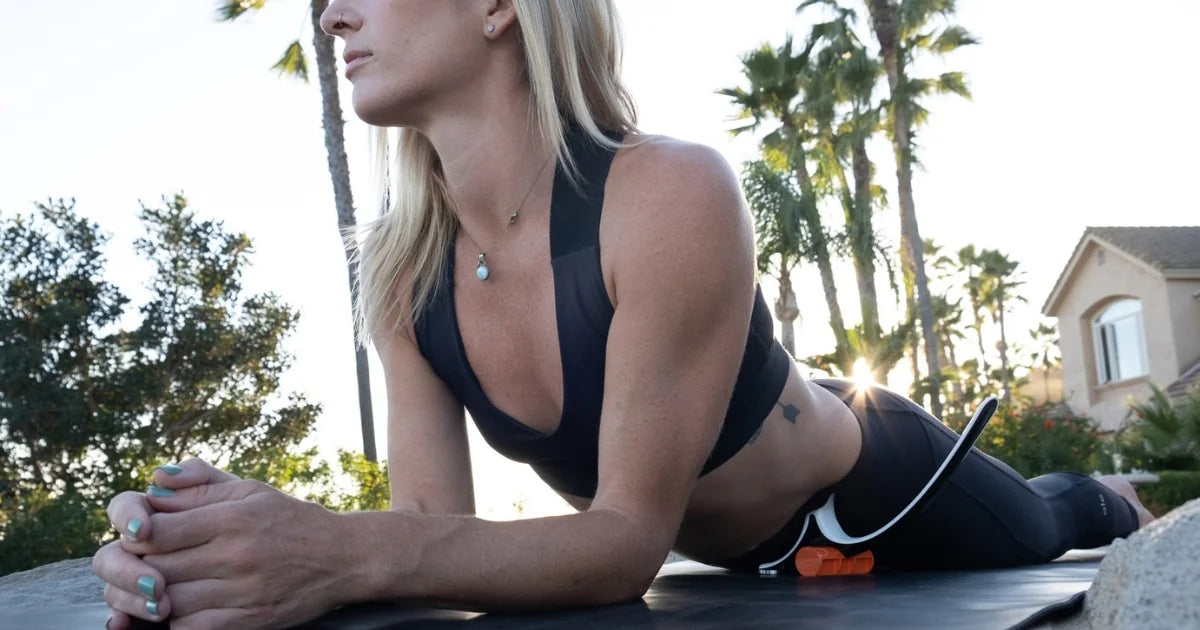
To use the Hip Hook lying down, lie face down on the floor and let your body weight settle into the tool, with the metal platform flat against the floor.
- Lie on your side, and position the tip of the Hip Hook in the release zone.
- Gently roll onto your stomach and hold the Hip Hook steady until the metal platform is flat against the floor.
- Bring your chest down to the ground and let your body weight settle into the tool to begin adding pressure.
To adjust the pressure: For less pressure, bend the knee on the side you're releasing and bring it out to the side. For more pressure, straighten that leg behind you. Start with your knee bent to the side and progress to a straight leg once you're comfortable.
To target the iliacus or psoas: For the iliacus, place the tip closer to the pelvic bone and gently press the handle to rotate it in. For the psoas, place the tip farther from the bone, keep it pointing straight into your body, and don't press the handle.

How long should I hold pressure with the Hip Hook?
Hold each spot for 90 seconds. The Hip Hook uses prolonged pressure (also called ischemic compression), and 90 seconds gets you past the point where most people let go too early.
Pressing on a tight muscle is usually uncomfortable at first. Within about 30 seconds, that discomfort should start to ease. If it doesn't, the tip probably isn't on a good spot, or you're using too much pressure. Shift the tip slightly or ease off, then try again.
Work 1 to 3 spots per side each session. More isn't better. Overworking the tissue can leave you sore the next day without adding any benefit.
The Aletha app has a built-in 90-second timer in every technique, so you don't have to watch the clock. It also has full programs that put the techniques in order.
What should I feel when using the Hip Hook?
You should feel tenderness or a dull, deep ache where the tip presses. Many people call it a "hurts so good" feeling. That's a sign you're in the right place.
Other normal sensations include:
- Discomfort easing. Within about 30 seconds, the tenderness should start to back off. As you keep holding, the tissue often softens or feels like it's melting.
- Warmth. A common sign the muscle is letting go.
- Twitching. The muscle is responding to the pressure. Hold steady and breathe through it.
- Referred pain. The iliacus and psoas often develop trigger points that send a dull ache to the hip, groin, low back, or front of the thigh. If you feel it somewhere other than where the tip is pressing, that's referred pain. Hold steady with gentle pressure until it eases.

What shouldn't I feel when using the Hip Hook?
If you feel any of these, the tip is off target or the pressure is too high. Stop and adjust before you continue.
- Sharp, shooting, or electric pain, or burning down the leg. Reposition the tip slightly and check that you're above the hip crease.
- Numbness, tingling, or a pulse under the tip. These mean you're on a nerve or blood vessel rather than muscle. Move the tip slightly off that spot and try again.
- Pressure so intense you can't breathe or relax. If you're holding your breath or tensing your whole body, ease off. The right pressure is one you can breathe through and stay with.
What if the Hip Hook feels too intense?
If the pressure is too much to breathe through and relax into, back off. Start at the gentlest level and progress gradually over days or weeks.
Here's the progression from least to most intense:
-
Orbit (Lying Down)
- Knee to the side: The gentlest starting point, and it works well for the psoas.
- Leg straight behind: Slightly more pressure.
-
Hip Hook (Standing)
- Feet even: A manageable way to start with the Hip Hook.
- One foot stepped back: Shifts more body weight into the tool.
-
Hip Hook (Lying Down)
- Knee to the side: The floor adds more pressure than standing.
- Leg straight behind: Shifts more body weight onto the tool.
If a step feels like too much, go back one and stay there until the pressure feels familiar. Forcing more intensity doesn't help. The muscle won't release if you're bracing against it.

Where can I learn more about using the Hip Hook?
Aletha offers videos, a user manual, an app, and a course to help you get the most out of the Hip Hook and your other Aletha products.
- User manual: Download the Hip Hook manual here.
- How-to videos: Step-by-step demonstrations on the Aletha website.
- YouTube: Find more videos on the Aletha YouTube channel.
- The Aletha app: Guided programs with a built-in 90-second timer. Available now on iOS, with Android coming soon.
- Foundations for Practitioners Course: A self-paced online course for trainers, coaches, therapists, and movement specialists who want to use the Hip Hook and other Aletha tools with clients. It includes CEUs for NASM, AFAA, and CanFitPro.
Still have questions? Email us at hello@alethasupport.com and our team will help.

Frequently Asked Questions
Where are the iliacus and psoas muscles?
The iliacus and psoas sit deep in the front of the hip, inside the pelvis. The iliacus is a fan-shaped muscle that lines the inside of the pelvic bowl. The psoas runs from the lumbar spine down through the pelvis. Both attach to the lesser trochanter of the thigh bone, and together they form the iliopsoas, your primary hip flexors.
Who shouldn't use the Hip Hook?
Don't use the Hip Hook if you're pregnant. The iliacus and psoas sit close to the uterus, and direct pressure in the pelvic area isn't appropriate during pregnancy. Check with your healthcare provider before using the Hip Hook if you've recently given birth or had surgery, or if you have an active infection, a blood clotting condition, or osteoporosis, or take blood thinners.
How do I know if I am pressing in the right spot with the Hip Hook?
You're in the right spot with the Hip Hook when you feel tenderness or a dull, deep ache under the tip, and that discomfort starts to ease within about 30 seconds. If you feel nothing, or the discomfort doesn't ease, shift the tip slightly within the release zone or lighten the pressure, then hold again.
Why do I feel pain in my leg when I press with the Hip Hook?
Leg pain while using the Hip Hook is usually referred pain from trigger points in the iliacus or psoas. These can send a dull ache into the front of the thigh, hip, groin, or low back. Hold steady with gentle pressure and it should ease. If the pain is sharp or electric, or comes with numbness or tingling, reposition the tip and make sure it's above the hip crease.
How often should I use the Hip Hook?
Use the Hip Hook every other day, or about three times a week. Work 1 to 3 spots per side each session, and alternate between the iliacus and psoas. If you're sore the next day, you probably worked too many spots or used too much pressure. Scale back and let the tissue recover before your next session.
Should I do other stretches or exercises alongside the Hip Hook?
Yes, stretches and exercises work well alongside the Hip Hook, as long as they come after the release. Reducing muscle tension first gives your stretches and strengthening exercises relaxed tissue to work with, which can help them work better. Follow the Hip Hook with a gentle hip flexor stretch, then strengthen your glutes and deep core with glute bridges, clamshells, or dead bugs.


If you’ve tried PT, massage, stretching, and the pain keeps coming back, the problem is likely not where you’re feeli...
- HSA/FSA eligible
- 60-day returns
- Free shipping
If you’ve tried PT, massage, stretching, and the pain keeps coming back, the problem is likely no...